
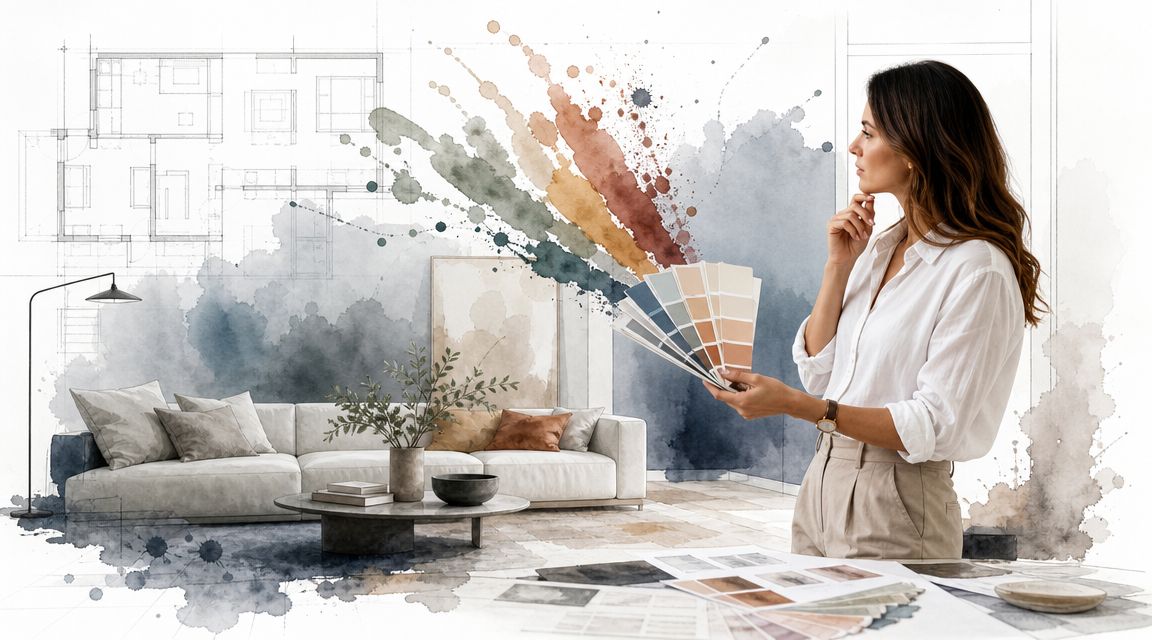
You're probably looking at one wall right now and thinking it needs to do more. In a living room, that might be the wall behind the sofa or fireplace. In a bedroom, it's usually the bedhead wall. In an open-plan apartment, it's often the only chance to define one zone without repainting the whole space.
That's where feature wall painting either looks deliberate or looks like an afterthought. The difference isn't the colour chart. It's the decisions made before the first coat goes on, then the prep, the masking, the sheen selection, and the way the paint is applied under real Melbourne conditions.
Table of Contents
- How a Feature Wall Elevates a Room
- Strategic Planning Before You Pick a Colour
- Assembling a Professional Toolkit
- The Preparation Process for a Perfect Surface
- Professional Painting Application Techniques
- Common Pitfalls and When to Call a Pro
How a Feature Wall Elevates a Room
A good feature wall gives the room a clear centre of gravity. It tells the eye where to land, which matters even more in Melbourne homes where layouts can be awkward, ceilings can vary, and natural light shifts hard between morning and afternoon.
In a Richmond terrace, that might mean pulling attention toward a fireplace wall instead of the long, narrow proportions of the room. In a South Yarra apartment, it can be the simplest way to separate living from dining without introducing visual clutter. In older homes around Kew or Hawthorn, a feature wall can also help existing architecture read more cleanly, especially when there's picture rail, chimney breasts, alcoves, or original cornice to work around.
Practical rule: A feature wall should anchor the room you already have. It shouldn't fight the architecture to create drama.
The jobs that hold up best are the ones treated like a full interior painting system on one wall, not a shortcut. That means substrate assessment, cleaning, repair, primer where needed, controlled masking, the right nap roller, and a finish chosen for both appearance and durability.
Trade judgement is paramount. Across 500+ projects completed, the pattern is consistent. The wall that looks simple on day one is usually the one that exposes every defect once a deeper or lower-sheen colour goes on. Darker colours, side light, patchy plaster repairs, old roller stipple, and dust left on the surface all show up fast.
Newline Painting approaches feature wall painting the same way we approach a full interior repaint. Written scope, prep standards, paint system selection, and a final walkthrough matter because one wall done well can lift a room, but one wall done badly becomes the first thing you notice for the wrong reason.
Strategic Planning Before You Pick a Colour
A feature wall usually succeeds or fails before the tin is opened. In Melbourne homes, the decision starts with what the wall has to do under the room's actual conditions: morning light, western heat, existing plaster quality, ceiling lines, glazing, and how the room is used day to day.
Choose the wall with a job to do
The right wall already has some architectural authority. It might be a fireplace breast in a period home, a bedhead wall in a main bedroom, a recessed dining wall, or the plane behind fixed joinery or a television. In open-plan rooms, the best feature wall often defines one zone cleanly without making the layout feel chopped up.
The first check is sightline. Stand at the entry, then at the main seating position, and then near the strongest window. If the wall reads clearly from all three points, it is usually a stronger candidate than a side wall with doors, bulkheads, mismatched returns, or too many interruptions.
A few filters help narrow it down:
- Choose a wall with a clear function. Fireplace walls, bedhead walls, and built-in joinery usually carry colour better than a random blank wall.
- Look for clean termination points. External corners, recesses, and ceiling changes help the colour stop in a way that looks deliberate.
- Be careful with busy walls. Multiple switches, vents, doors, patchy old repairs, and uneven cabinetry create visual noise and make cutting-in harder to keep sharp.
For readers weighing broader repainting details around trims and frames, Professional Window Cleaning's guide to repainting is a useful reference because the same rule applies indoors. Sharp edges and sound surfaces are what make the finished line look clean.
If the room has mixed flooring, cream period trim, or daylight that swings from cool to warm across the day, a proper colour consultation in Melbourne helps sort out the wall position and finish level before colour samples start to muddy the decision.
Read the light before you read the colour card
Light changes colour, but it also changes what the wall surface shows. That is the part many DIY plans miss.
South-facing rooms in Melbourne tend to read cooler and flatter, so deeper tones can hold their shape without looking harsh. West-facing rooms are less forgiving. Afternoon sun can make warm colours feel stronger and can throw raking light across the wall, which highlights patching, roller lines, and any difference in sheen between repaired sections and the original substrate.
Finish selection matters as much as colour selection. For many living areas, a quality low-sheen acrylic gives the best balance. It is washable, it softens minor surface irregularities better than semi-gloss, and it does not reflect side light as aggressively. In bedrooms, a matt or very low-sheen finish can look excellent on sound plaster, but it comes with a trade-off. Lower sheen can scuff more easily, and touch-ups can read differently if the wall gets marked.
A dark colour on a wall with strong side light needs a higher prep standard. There is no shortcut around that.
Handle sloped walls as a layout problem first
Walls under raked ceilings, attic conversions, and upper-storey eaves need a different plan. The main decision is where the colour should stop so the room feels intentional from normal viewing angles, not whether every surface should be treated the same.
In practice, that usually means following the architecture that already exists. Align the colour break with the slope, a return, or a structural change in plane. If the line is forced across an awkward angle, the room can look unresolved even if the paintwork itself is neat. General inspiration on this point appears in guidance on slanted wall decor ideas, but on site the test is always proportion and sightline.
Older Melbourne renovations bring another layer. Settled framing, small undulations in plaster, and older cornice profiles can make a perfectly straight colour break look visually off if it ignores the room's existing geometry. A good plan accounts for what the house will let you get away with, then sets the line where it will read straight to the eye.
Assembling a Professional Toolkit
Feature wall painting looks simple until the wrong tape lifts, the roller stipple doesn't match, or the brush leaves a fat edge line you can see from the doorway. The toolkit matters because each tool controls a different failure point.
What stays in the kit for every feature wall
A professional setup usually includes:
- High-adhesion painter's tape for trim, skirting, ceiling lines, and adjacent walls. Cheap tape is one of the easiest ways to lose a sharp edge.
- Synthetic cutting-in brush in the right size for detail work. For controlled edge work, the professional standard is a 1–2 inch brush rather than an oversized brush that floods the line.
- Roller frame and suitable nap sleeve matched to the substrate. Smooth plasterboard wants a different sleeve from a wall with more texture or earlier roller stipple.
- Drop sheets and masking film because feature walls are often painted in furnished rooms, not empty sites.
- Filler, sanding abrasives, and dusting tools since patching and denibbing are almost always part of the job.
- Primer or undercoat where the substrate needs sealing, stain isolation, or better adhesion.
Paint selection also matters. Newline Painting commonly works with Dulux, Haymes, Taubmans, Berger, and Wattyl systems, with the actual product chosen to suit the room, substrate, and finish level required rather than brand loyalty alone.
A feature wall rarely fails because the colour was wrong. It usually fails because the edges, surface flatness, or sheen choice didn't suit the room.
Paint Sheen Comparison
| Sheen | Appearance | Washability | Best For |
|---|---|---|---|
| Matt | Very low reflection, soft look | Moderate | Bedrooms, low-traffic feature walls, walls where a subdued look matters |
| Low-sheen | Soft finish with slight reflectivity | Good | Living rooms, hallways, most interior feature walls |
| Semi-gloss | Noticeably reflective | Higher | Trim, doors, some joinery, not usually the first choice for broad feature walls |
| Gloss | High shine, highlights every defect | Higher | Specialty details, not typical for feature wall painting |
The practical trade-off is straightforward. The more reflective the sheen, the easier it is to clean, but the more it shows substrate defects, sanding scratches, and roller texture. For broad wall areas, lower sheen usually gives the cleaner visual result.
The Preparation Process for a Perfect Surface
A feature wall can be the strongest surface in the room and still look second-rate if the wall itself is uneven, dirty, or unstable. In Melbourne homes, that risk is higher than many clients expect. Older plaster can be soft and chalky, newer patchwork often flashes under low-sheen finishes, and south-facing rooms reveal defects differently from bright open-plan spaces with strong afternoon sun.
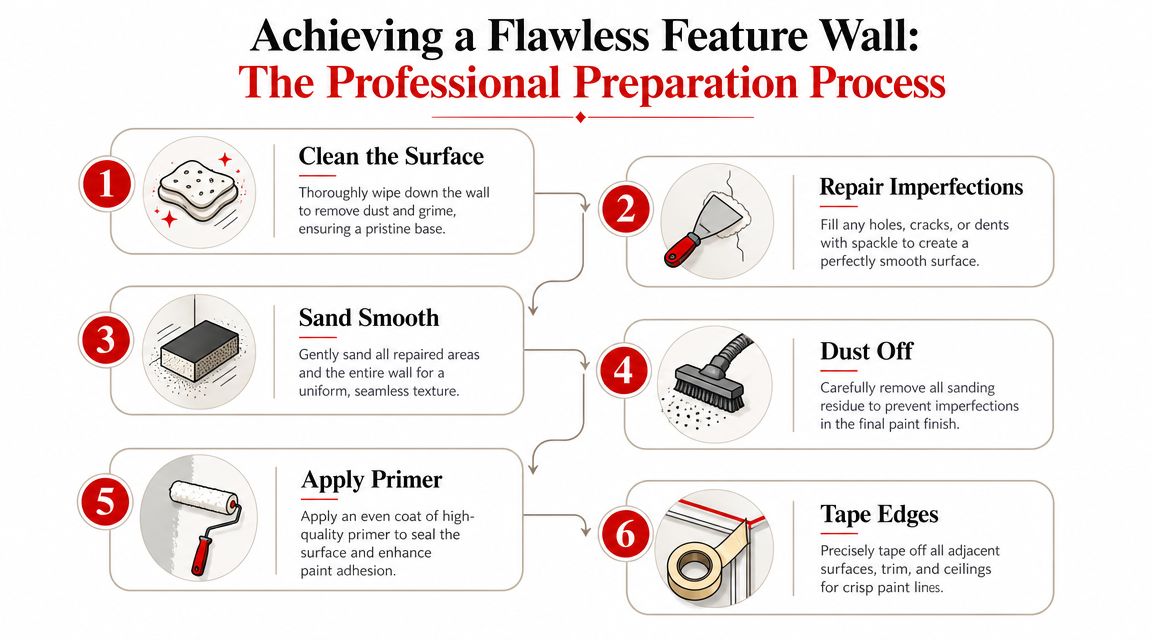
Prep determines the finish
The first decision is whether the selected wall is ready to carry a darker colour, a higher-sheen product, or a finish that will catch side light. A wall opposite large windows often needs more filling and sanding than a wall in softer light, because raking light exposes every hollow, sanding mark, and paint ridge.
The sequence on site is straightforward, but each step has a clear purpose:
- Protect the room properly. Move furniture where possible, cover floors, and shield nearby joinery and fittings from dust and splatter.
- Wash the wall before any repairs. Dirt, cooking residue, hand oils, and aerosol build-up stop filler and paint from bonding cleanly.
- Assess and repair defects. Fill nail holes, dents, hairline cracking, and any previous patches that have shrunk or sat proud of the surface.
- Sand for flatness, not just smoothness. The goal is to feather repairs into the surrounding wall so they disappear once the topcoats go on.
- Remove dust completely. Fine dust ruins adhesion, contaminates the finish, and weakens tape lines.
- Mask only after the surface is clean and stable. Tape performs better on dust-free trim and gives a sharper edge when it is pressed down properly.
Skipping the wash-down is one of the most common reasons a feature wall underperforms. Walls near kitchens, dining areas, and hallways often carry a thin film of contamination that is easy to miss until the first coat starts dragging, fisheying, or drying patchy.
Moisture problems need attention before any coating work starts. If the wall has staining, bubbling, musty odours, or recurring discolouration, check the cause first rather than sealing it in and hoping for the best. This guide to detecting mold issues in walls is a useful starting point, especially in older Melbourne properties and rooms with poor airflow.
When primer changes the outcome
Primer earns its place when the substrate would otherwise absorb unevenly, reject the topcoat, or bleed contamination back through the finish. That is common on repaired plaster, old water stains, smoke damage, and walls changing from a light colour to a deep tone.
In practice, the primer choice depends on the problem:
- Stain-blocking primer for water marks, smoke residue, or old staining that can bleed through fresh paint.
- Adhesion primer for hard, slick, previously painted surfaces where standard acrylic can struggle to grip.
- Sealer or undercoat over filler and repaired plaster so patched areas do not flash duller or shinier than the surrounding wall.
The trade-off is time. Primer adds another stage, but it often saves an extra finish coat and reduces the risk of patchiness showing up once daylight hits the wall. For a darker feature wall, that is usually time well spent.
For a more detailed breakdown, see our guide on how to prepare walls for painting step by step.
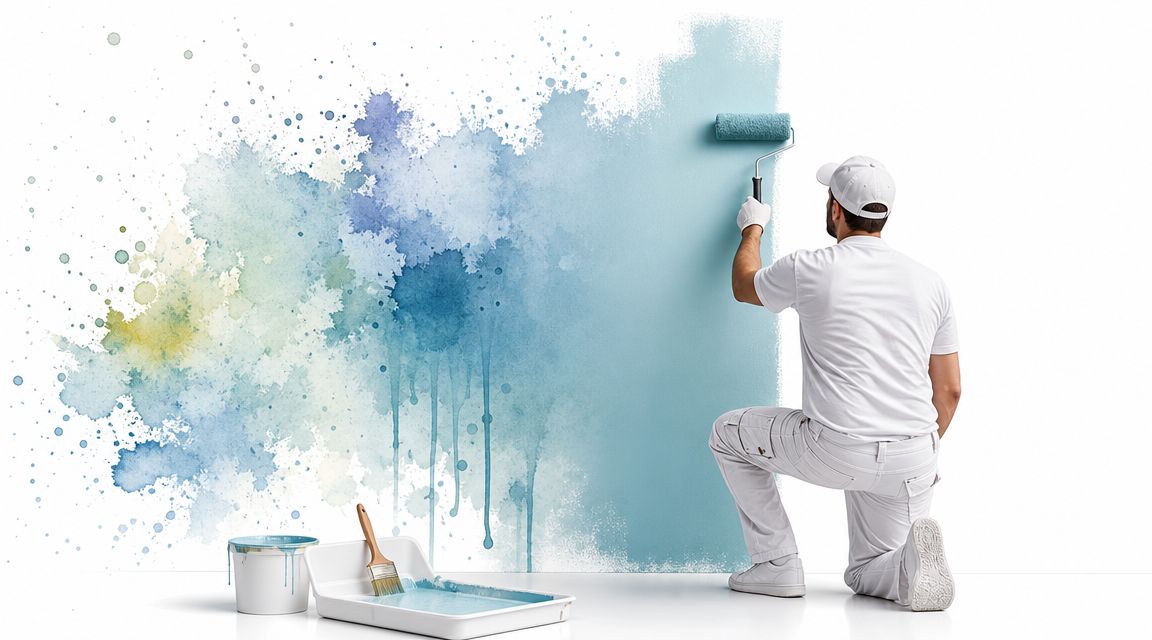
Professional Painting Application Techniques
Application decides whether a feature wall reads crisp and even, or patchy and amateur, once Melbourne daylight hits it. A wall can be perfectly prepared and still fail visually if the paint film goes on unevenly, the edges build up too heavily, or the working time is misjudged.
Cut in first, then roll for uniform coverage
On a feature wall, the sequence matters. Cut in the perimeter first with a quality 1 to 2 inch angled sash brush, then roll the main field while those edges are still open enough to blend. That keeps the border from drying as a separate band, which is one of the main reasons feature walls show framing lines around the ceiling, skirting, and corners.
Use the brush to place paint accurately, not to flood the edge. A heavy cut line leaves a raised picture-frame effect that often flashes once the wall cures, especially with low-sheen or deep-colour finishes. I keep the brush line neat and controlled, then bring the roller as close as practical to marry the texture.
Roll with a properly loaded sleeve, usually laying the paint out in a broad W or M pattern before evening it off. The key is consistent film build across the wall. Too little paint creates dry stipple and weak colour depth. Too much pressure leaves tracking and pushes paint to the roller edges. For a closer look at loading, pressure, and layoff technique, see our guide on using a paint roller like a professional.
The final passes should all finish in the same direction. On larger walls, I also work in sections wide enough to maintain a wet edge but small enough to control before the acrylic starts to grab. That judgement changes from room to room.
Melbourne conditions make a difference here. Afternoon sun through west-facing glazing in Kew or Brighton can heat one part of the wall faster than the rest. Open windows in a period home can push air across the surface and shorten the working time. Reverse-cycle heating in winter does the same thing. If one section starts setting before the next is rolled into it, lap marks are much more likely.
A feature wall rewards control, not speed. The finish depends on wet edge management, even pressure, and keeping the texture uniform from one end of the wall to the other.
A short visual reference can help if you want to see the motion and pace more clearly.
Manage drying and edges properly
Most defects show up between coats. The first coat often looks acceptable while wet, then dries with holidays, flashing over repairs, or roller lines that only appear under side light.
Recoat timing should follow the product data sheet and the room conditions on the day. Touch-dry is not the same as ready to recoat. If the surface is still soft underneath, the second pass can drag the first coat, reduce opacity, and leave a rougher finish. Darker feature colours are less forgiving here because any inconsistency in sheen or coverage is easier to see.
Tape needs the same level of judgement. Leave it on too long and the paint can bridge and tear. Pull it too early and the edge can slump or mark. On clean, well-sealed junctions, I remove tape carefully once the coating has set enough to hold a line but before it hardens into a brittle edge.
A sound feature wall usually needs two full finish coats for depth, consistency, and washability. Some strong colours and lower-hide products need more attention to get full colour saturation without overworking the surface. That is one reason professional application is not just about getting paint onto the wall. It is about building the right film thickness, with the right texture, under the light that room gets.
That standard is also what sits behind a 7-year workmanship warranty. The wall has to look right after it dries, after the light changes, and after the room goes back into daily use.
Common Pitfalls and When to Call a Pro
Most feature wall problems are predictable. Tape bleeds because the surface was dusty or the edge wasn't sealed properly. Roller marks show because the nap, pressure, or loading was wrong. Patchy coverage happens because repairs weren't primed or the wall needed more prep than expected.
The bigger issue is that a feature wall sits in the most visible part of the room. On a broad wall in a Brighton apartment with strong side light, or on a chimney breast in an older Hawthorn home, small defects don't stay small. They become the thing everyone notices first.
A DIY approach can work on a straightforward wall with good plaster, clean geometry, and forgiving light. It becomes a false economy when the room is occupied, the edges are complex, the wall includes old repairs, or the house has delicate period surfaces. Heritage homes, in particular, need a steadier hand because old substrates can react unpredictably once prep starts.
If the wall has difficult light, damaged plaster, awkward ceiling lines, or heritage detailing, the painting itself is the easy part. The judgement calls are what you're really paying for.
For many owners, the sensible line is simple. If you want a wall that reads cleanly from every angle, with proper prep standards, trade-qualified painters, and the backing of $20M public liability insurance, bring in a professional team.
If you'd like a feature wall assessed properly, Newline Painting can arrange a free on-site quote anywhere across Melbourne. We'll look at the wall selection, substrate condition, paint system, sheen, and edge details before any work starts. Or call 1300 044 206 if you'd prefer to talk it through first.